Step 1: buy the perfect domain
You'll need to buy a domain from a domain broker - I recommend PorkBun as they are relatively small, but trustworthy, and support multiple domain extensions (TLDs), so you can do clever things like finte.ch or your.mom domains.
Step 2: rent a spot in the cloud
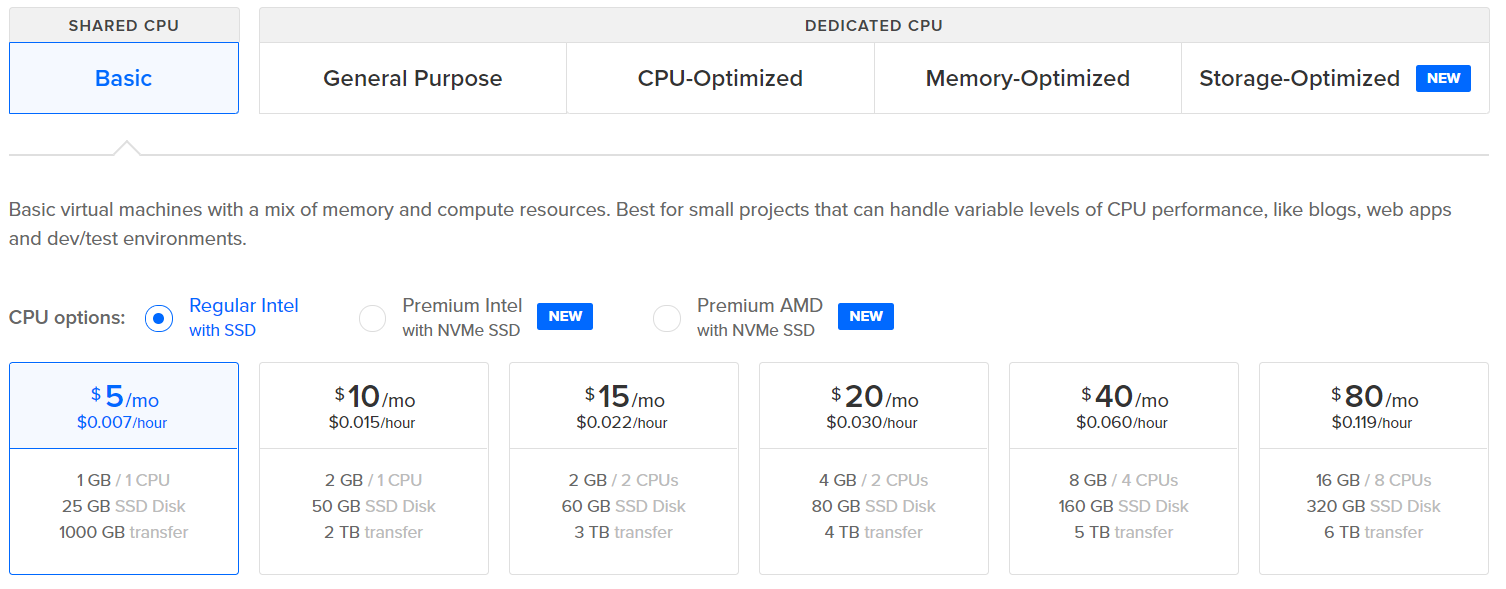
I recommend to use Digital Ocean here (www.digitalocean.com) as they are pretty much the cheapest fully-hosted option out there that gives you a minimum level of service. You can host and run your website on a 5 dollar-a-month droplet.
They also offer nameserver management. In order to enable this, go into your domain registrar's control panel and set up the nameservers for Digital Ocean like this:

It will take up to 48 hours for this to take effect. Go drink some coffee!
Step 3: create your Virtual Server
Go into Digital Ocean and create a new droplet. This is basically a rented Linux computer in the cloud:
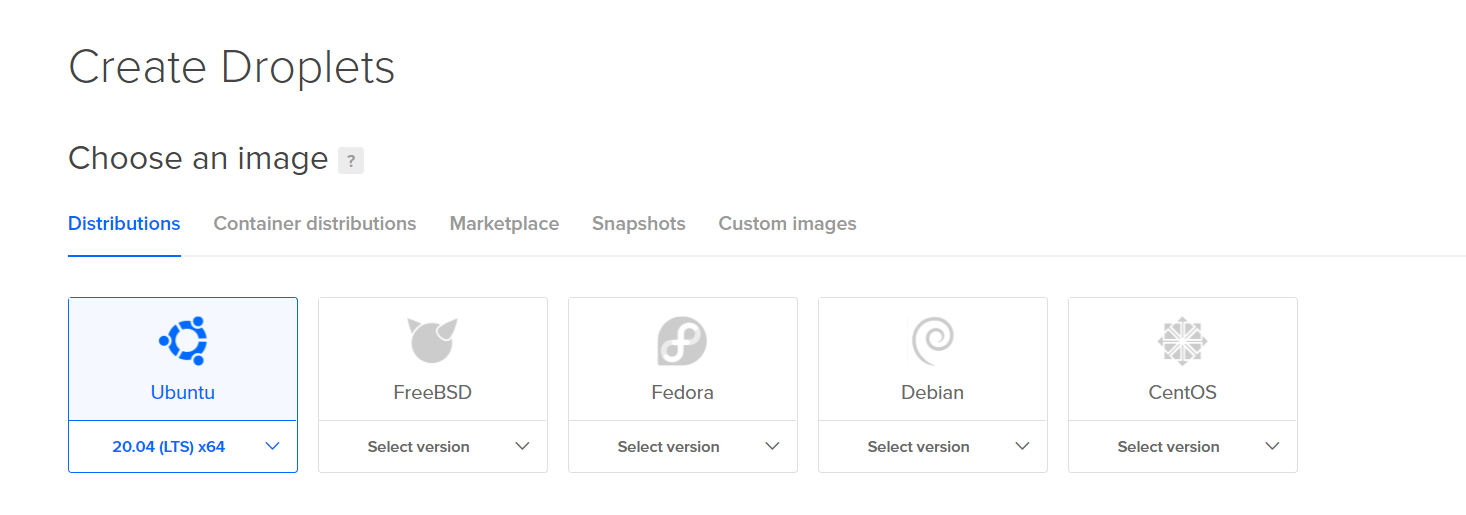
Of course, you can create a Marketplace Ghost distribution by clicking on the Marketplace tab - but I would recommend against that. It's better to just have a box that you fully control, so if anything breaks you know how to fix it.
Step 4: secure your Server
Create SSH keys to SSH into your Linux box. You can use a password if you want, but I recommend just doing things by the book with a full private-public key set. On mac and linux you can just use ssh-keygen in the terminal; but on Windows you should generate an SSH key using Puttygen, like this.
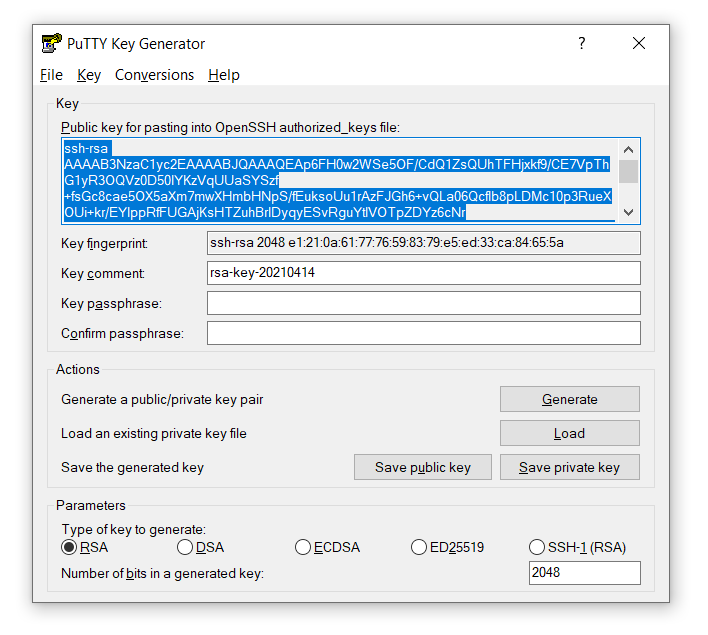
Of course this key should be kept secret, not shared. Save both the public and private key in a secure location (yes to local backups, no to e-mailing it to yourself, yes to encrypted secure backups in the cloud, no to chucking it on Google Drive or Github as a .txt file). Remember to set a 'key passphrase' for your private key too - so you have a last layer of defense should you lose it to some ill-intentioned hands!
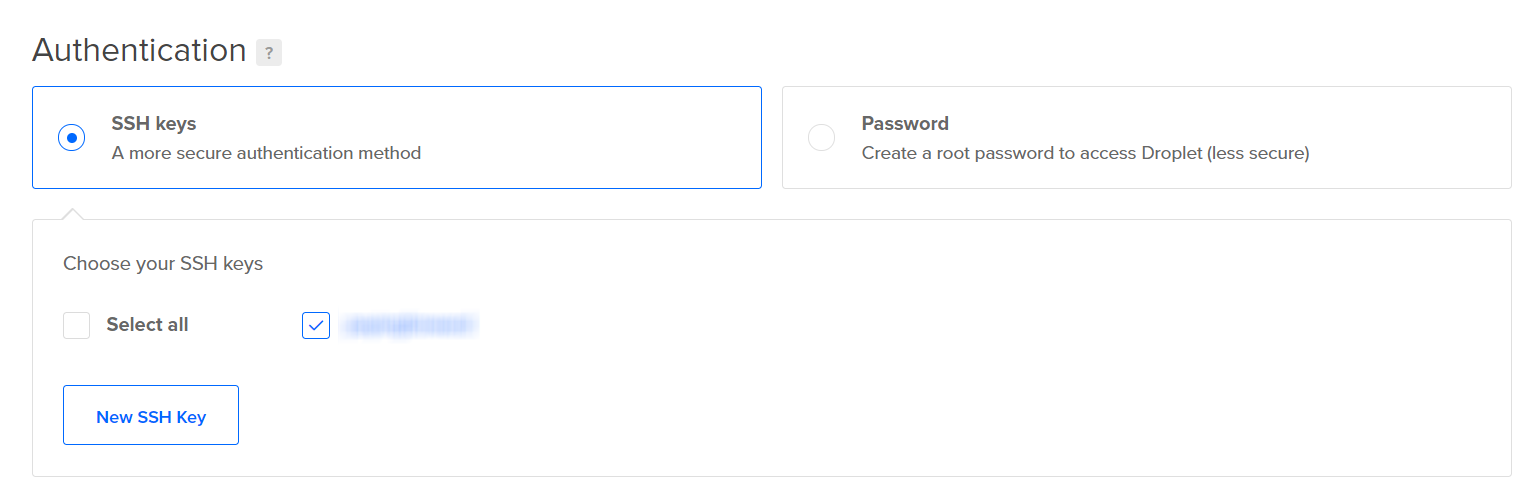
Now take the Public Key from above (selected in blue) and paste it into the 'new key' button on your droplet creation page. Remember to select it!
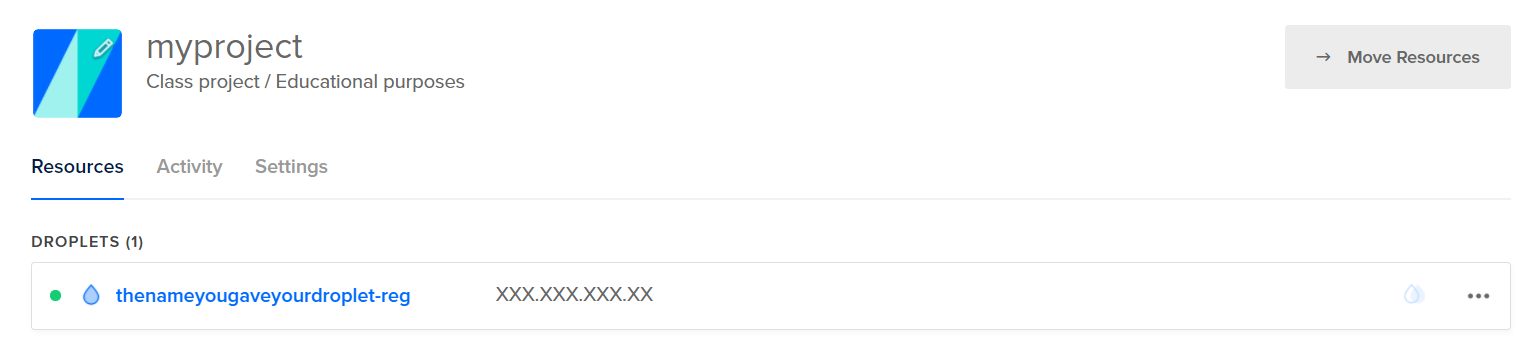
Now create a new project, and move the resource you just created into it. You will be assigned an IP address (the format is XXX.XXX.XXX.XXX)
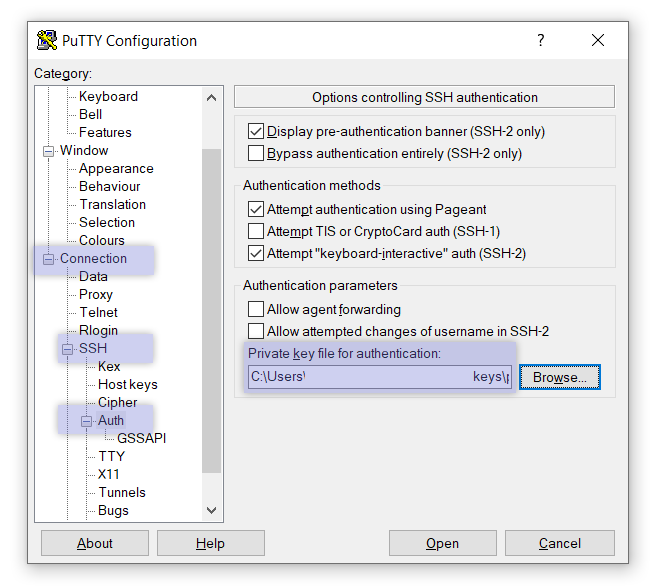
You can now check the creation of your droplet went well, by opening Putty and adding the location of your private key to the putty configuration,
And connecting to a session using the IP of your droplet, like this
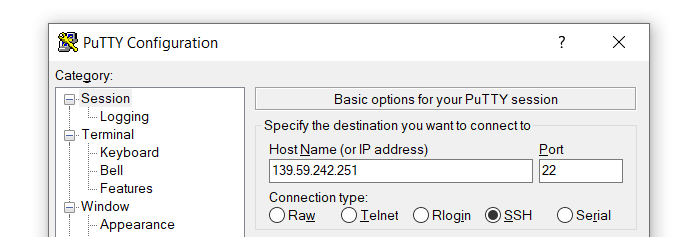
Click Open and, in the command prompt that opens up, authenticate as root (type it in and press enter).
You should see this:

Congratulations! You have a machine in the cloud!
Now, time to install the blog. But first, you want to connect the domain you bought and the server you rented!
Step 5: link your domain and your VPS

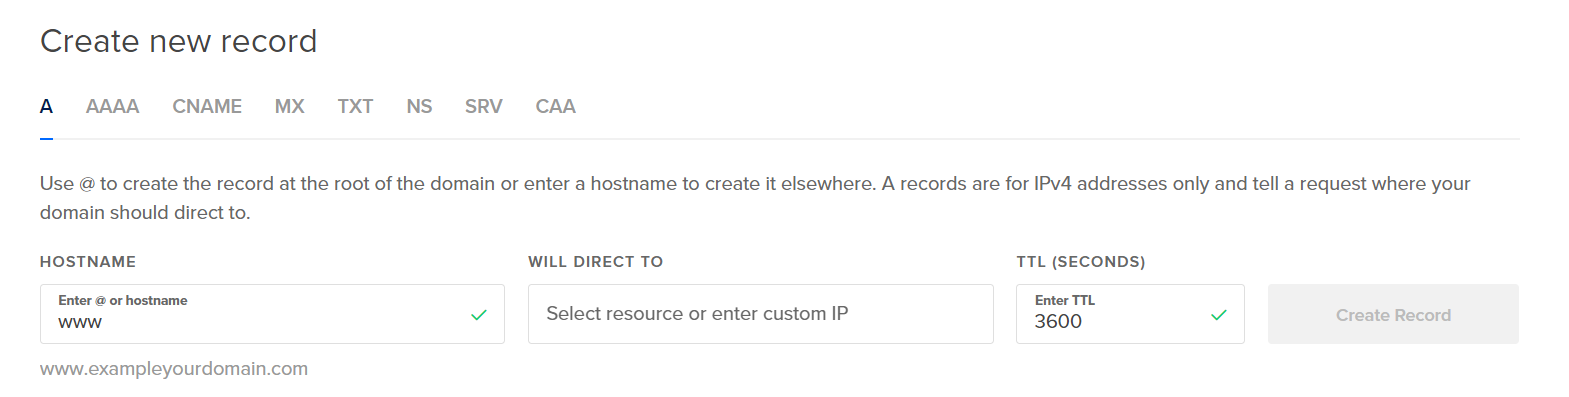
Select 'Add a domain', and type in your domain name

A and AAA records (if you selected ipv6 too) should be created automatically. Also remember to type in www so that www.yourdomain.com also points to your website!
It will take up to 48 hours for this to take effect. Go drink some coffee!
You can verify your domain propagation by checking for A and AAAA records using DNS checker.
Step 6: set up Linux
Log onto your droplet using Putty as you did at the end of Step 4, and create a user for Ghost (replace chooseYourUserName with the username of choice; any name except root, admin or ghost!)
adduser chooseYourUserName
usermod -aG sudo chooseYourUserName
Then log on
su - chooseYourUserName
And upgrade (this may take a bit)
sudo apt-get update
sudo apt-get upgrade
Install Nginx (that's the server daemon that will serve your beautiful webpages)
sudo apt-get install nginx
sudo ufw allow 'Nginx Full'
Now install mySQL (that's the database you'll use to store your precious data)
sudo apt-get install mysql-server
Since you should have chosen Ubuntu 20, you'll need to follow a secondary step to create a user:
sudo mysql
And use the following SQL command to set the password:
ALTER USER 'root'@'localhost' IDENTIFIED WITH mysql_native_password BY 'password';
quit
Finally, log onto your user again (this should happen automatically, but do it just in case)
su - chooseYourUserName
Now install nodejs (the server used to run Ghost Blog)
curl -sL https://deb.nodesource.com/setup_14.x | sudo -E bash
sudo apt-get install -y nodejs
Finally, install the Ghost command line:
sudo npm install ghost-cli@latest -g
You're all done!
Step 7: set up Ghost 👻
First of all, as the Ghost Install Guide mentions set up a proper folder for Ghost:
# Create directory: Change `sitename` to whatever you like
sudo mkdir -p /var/www/sitename

# Set directory owner: Replace chooseYourUserName with the name of your user
sudo chown chooseYourUserName:chooseYourUserName /var/www/sitename

# Set the correct permissions
sudo chmod 775 /var/www/sitename
Now you just navigate the folder and start the setup:
cd /var/www/sitename
ghost install
That's it! Don't forget to automatically set up NGINX and SSL during the set-up procedures! Just follow the instructions, then surf to yourwebsite.com/ghost to get started.
Happy blogging! 🚀